Activities · Teaching Methods

Paper Companion Activities for Pivot Interactives

You know how I feel about online work! (Looking for Physics Classroom Companion Worksheets? Find them Here!)

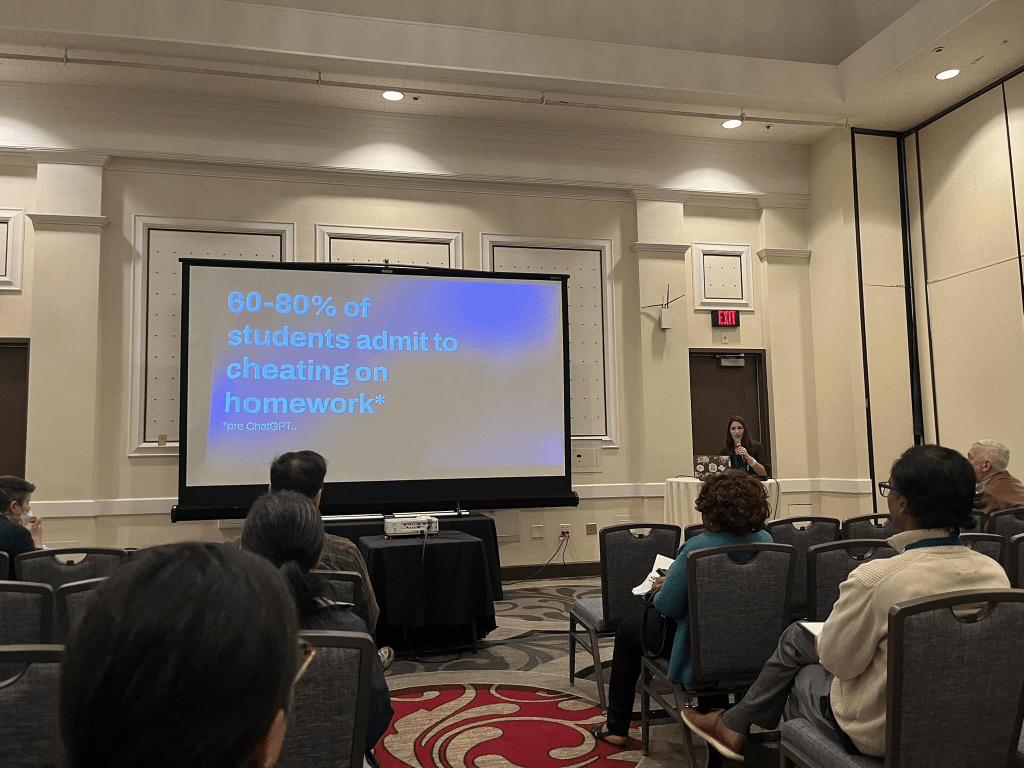
When I took high school physics almost everything was online. From physics classroom assignments, to the dreaded WebAssign, it was online. And because it was online, I like others, gamed the system (pre chat GPT). You know a certain number is going to show up somewhere in the answers? Enter it in all the blanks for the first submission so you can focus on the actual calculations. On the flip side was the part where you tried the problem so many times by the time you got it right you had no idea what actually worked. For the better part of my career I’ve been vehemently against all forms of online homework. There’s something about that screen that just puts a stop to the idea of using scratch paper for novice learners and we can’t have that!

(For what it’s worth, when AP went all digital I did NOT feel the urge to go digital in my classroom. I continued to do everything on paper. When APs came around I found my goal was acheived: I proctored the macro exam and did a count. 80% of physics students were using their scratch paper during the exam, while only 30% of non-physics students used their paper.)

The first exception I made to online learning was Pivot Interactives. I was using Peter’s work back when they were “Direct Measurement Videos” which meant I had paper copies originally, anyway. As Pivot upped their game (including deep randomization and autograding) I started using some of these assignments since it sure made my life easier!

However, what I’m finding with my students this year is that like my Webassign days, students are doing the minimum to get all the green checks. This looks like not reading the prompts that explain what they’re about to do next and why, not actually collecting the data for the graph and totally missing the connections between the sample measurements and the data collection.

So, I’ve started to reimplement some paper versions.

The Activities: A Journey of Trial and Error

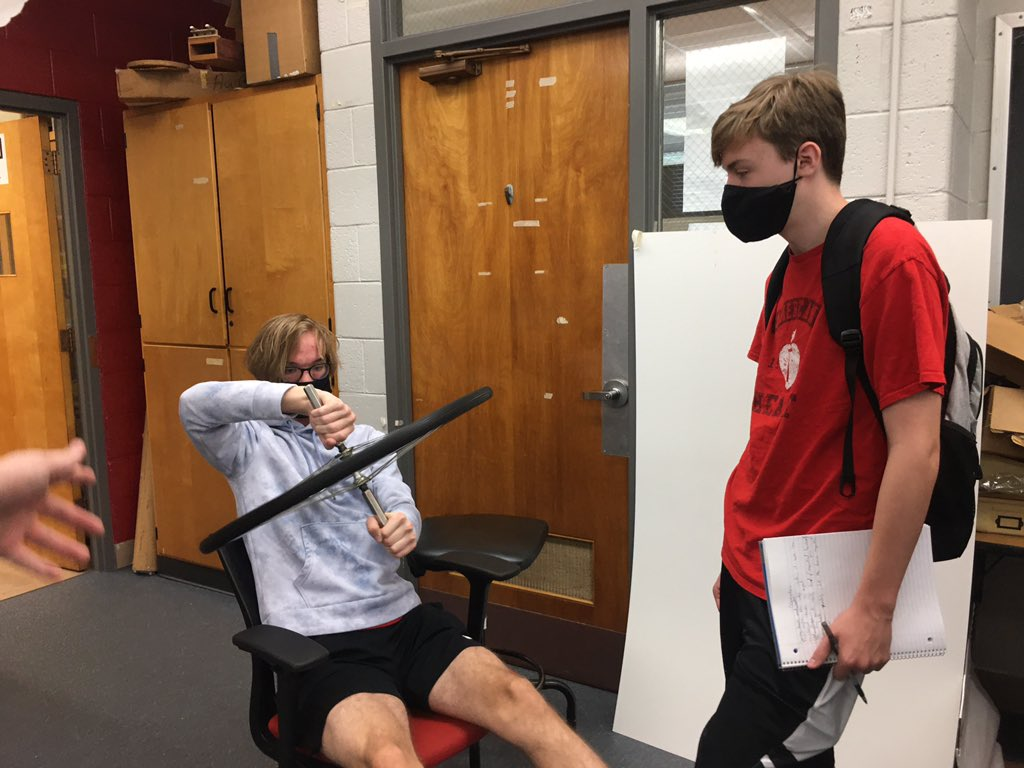
Earlier this year I assigned the helmet collisions activity. I added a prompt at the end that requested students to do the following:

  • What was the purpose of the activity?
  • Describe the procedure for conducting the investigation
  • Describe the calculations you made and why we made each calculation. You should include details regarding your values!
  • Describe what we learned from this activity about helmets as it relates to the impulse-change in momentum relationship.

This was ok, but I, arguably did this a bit hastily. I realized I wanted these documents handwritten and maybe a bit more depth/scaffholding.

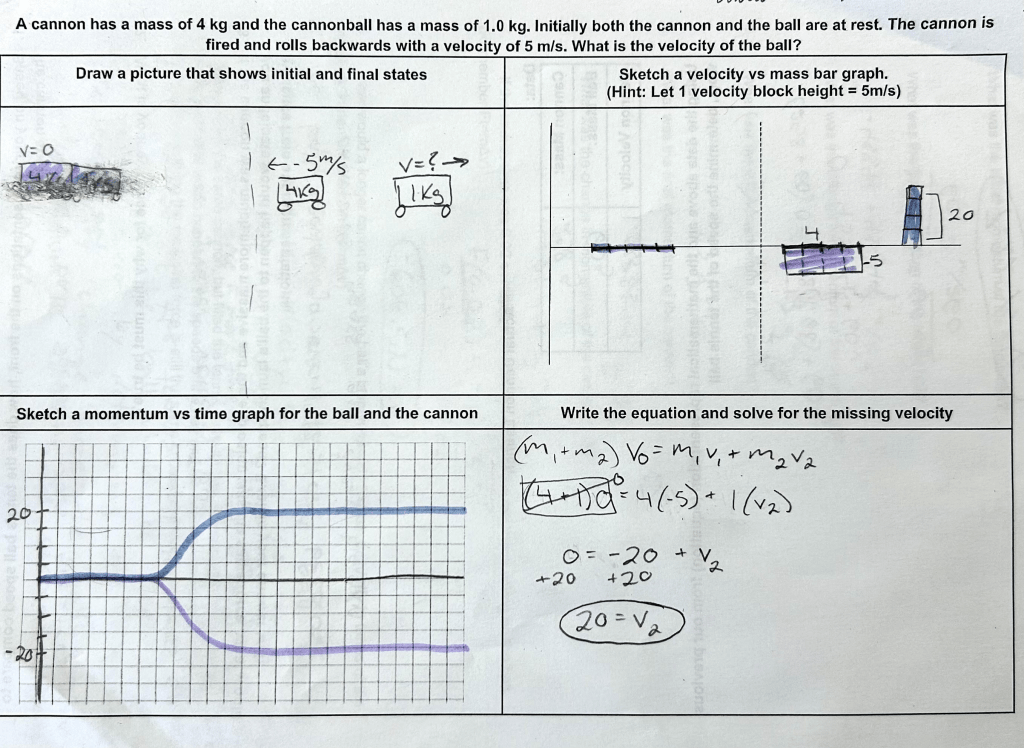
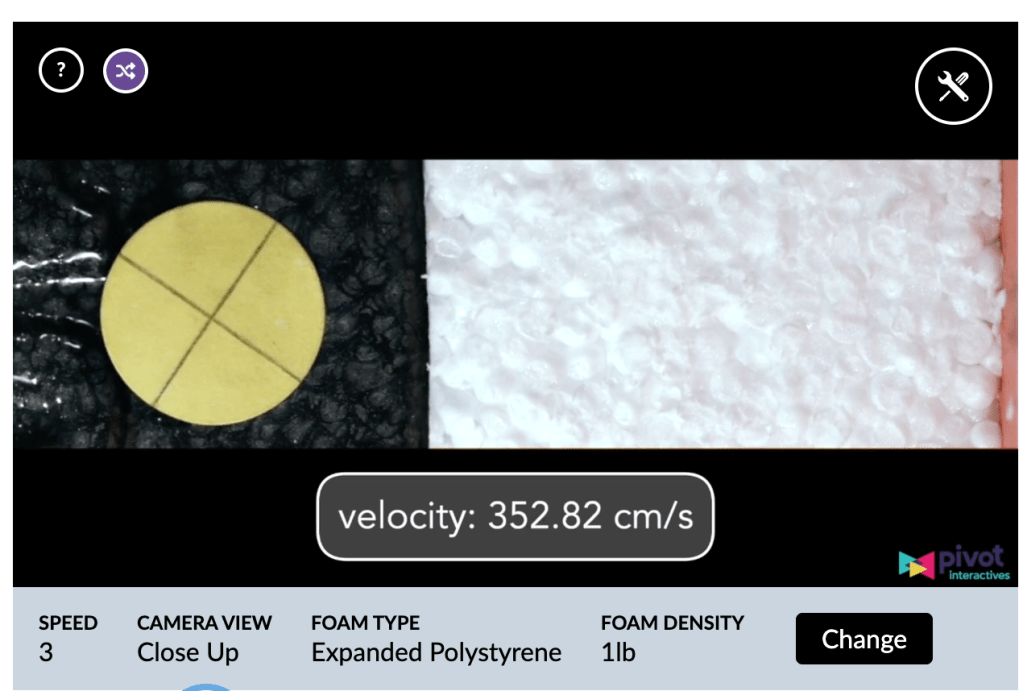
A few weeks later I assigned the Explosions (Not Really) activity.

I knew that students would totally ditch all of the methods we had been using, so I decided to give them a paper to complete before the activity that related to the activity. This required them to complete the calculations with similar, but easy numbers and then have me check their work prior to the activity. This got a good chunk of kids on board, but some still struggled with the transference.

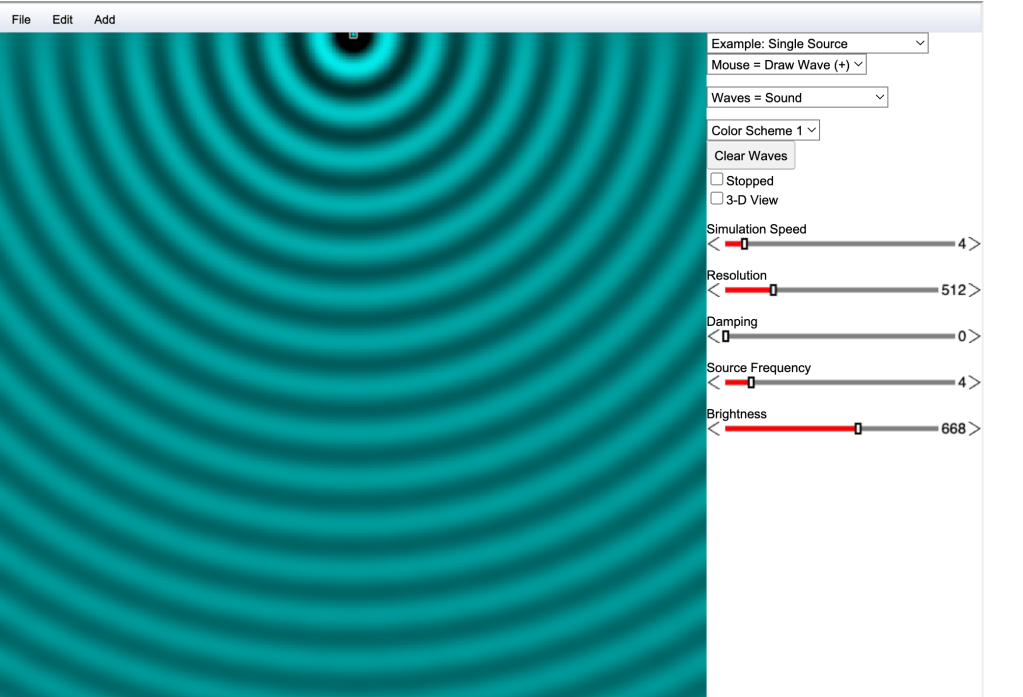
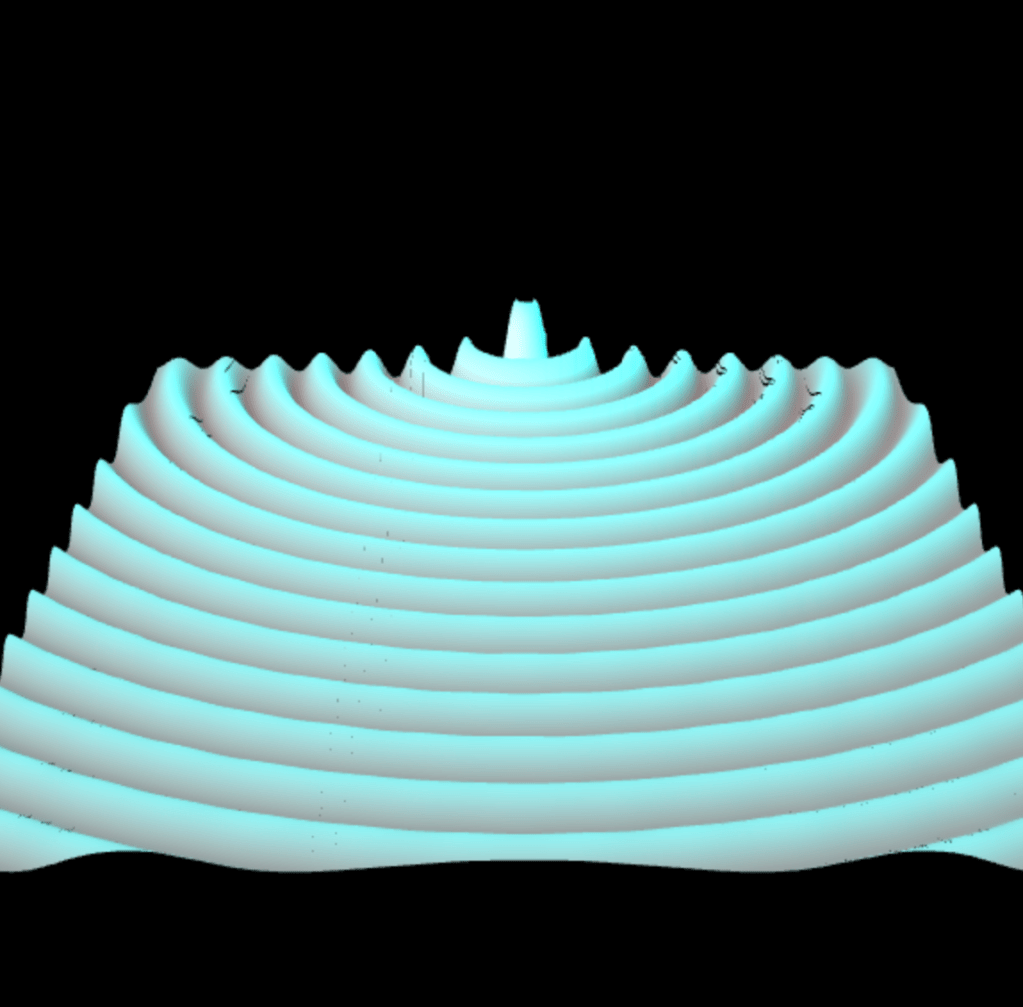
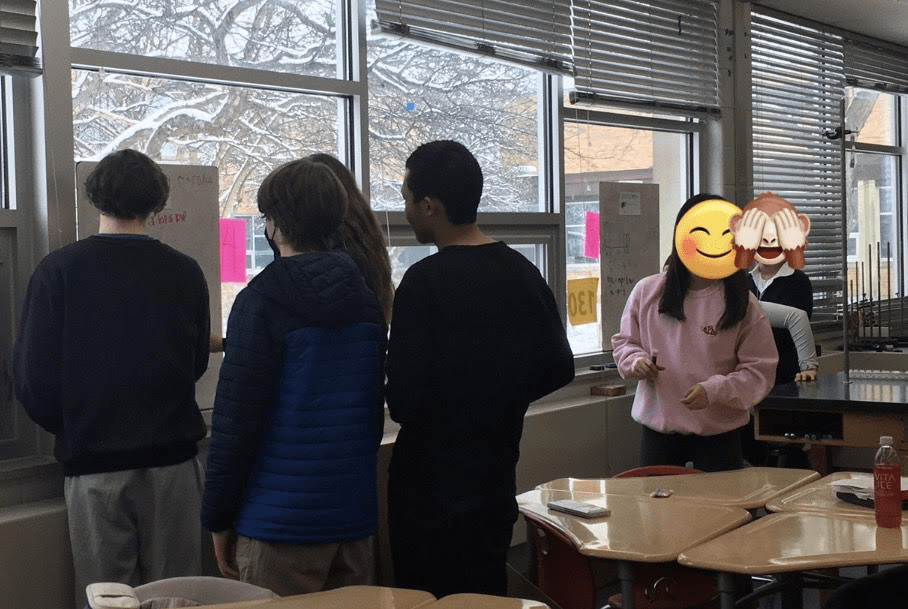
Still not completely satisfied, this past week I assigned the “Intro to Transverse Waves” activity. In this activity students are going to linearize a graph. This is a skill we don’t really cover in my regular level physics, but I like doing it at this point in the year because it’s such a powerful tool. As I anticipated, many students were ignoring the text about linearization completely. I chose a different approach to the paper copy.

I gave students this document which contains the following prompts:

First, I asked them to describe to me some of the new vocab as well as how we obtained our measurements

Next, I use a modified template from the Patterns Curriculum when students write conclusions in labs where we have graphs. It looks like this:

After investigating the behavior _______________, I conclude that there is a ______________________relationship between the [independent variable name]  and the [dependent variable name] As the [independent variable] kept increasing, the [dependent variable]_____________________________. This system of a ___________________ can be mathematically modeled as:

[write the final equation]

where the constant  [slope value]  is the [description of slope for this experiment]

I require students to write the ENTIRE paragraph from start to finish. This is not a fill in the blank activity.

This is currently my favorite interaction of the paper follow up and I’ll probably build more of these moving forward. I’m really in love with the patterns physics conclusions because it really requires students to put everything together.

Grading

I’ve noticed there’s a VERY strong correlation on these summaries between students who took the activity seriously and learned from it, vs students who did not. Because of this, the only thing I really need to grade with care is the conclusion paragraph itself. If students did the lab correctly, this paragraph looks great. If not, they usually don’t do well on this.

Do you do anything like this? What does it look like? How do you support genuine learning using online platforms?

Activities · Classroom Issues · In My Class Today

Teaching Students How to Score Better

At the American Association of Physics Teachers Winter Meeting I had the privilege of presenting in literally the best session of the entire conference (no bias here at all). Magically, all four of our presentations beautifully complimented one another and related deeply to engaging students in metacognitive skills.

I transitioned districts this year. In my previous district I worked with a lot of students in the gifted program, a lot of students in the creative and performing arts program (who are basically also gifted) and within this culture and climate, all kids benefitted, even the ones who were not in a special program. For years I was able to get students on board with the Expert Game, and the Science of Learning Physics some trust in the process, and good relationships. This year, that hasn’t quite cut it. I’d been thinking about a way to somehow “teach” students in a way that feel like “teaching” to them about how to learn, study and grow so they might buy into the idea (which is really nothing new).

I had been digging back into Powerful Teaching and some kind of workshop was begining to materialize, albeit very, very fuzzy. And then, at Winter Meeting, Aaron Titus gets up and shares that he offers a “How to Do Better on the Test” workshop which turns out to be “How to Learn”

The workshop is grounded in the work of Dr. Saundra McGuire. There are a lot of resources of hers around the web, like this lecture here on metacognition, but primarily she has a sweet little book called Teach Yourself How to Learn. It’s short, sweet, to the point and a lot of fun to read. Dr. McGuire is a retired chemistry professor and Director Emerita of the Center for Academic Success. She is also an awardee of the Presidential Award for Excellence in Math and Science Mentorship.

Immediately in chapter one she discusses one of the aspects about college that is hardest for students: getting As and Bs in high school often comes down to memorization and regurgitation. Now, before you come with fire I know that many of us (especially if we teach AP, and definitely if you enjoy my blog) are making students do incredible things. But I also know that you can probably name more than a handful of colleagues who don’t push their students beyond memorization. Teachers who produce study guides that are basically a carbon copy of the exam. Exams that are almost all multiple choice and the math is strictly plug and chug. The dreaded triangle to “support” students doing equations like F=ma. And if not the teachers themselves, some really great high school students simply don’t get pushed beyond needing to simply show up to class to learn the information. They can get away with minimal to no homework and no studying and still do okay in the class because we see them every single day and they work hard in our rooms.

So the workshop starts by introducing students to Bloom’s Taxonomy and we have a conversation about what level they are operating at most of the time, compared to what level they need to operate at for AP Physics. What level do they think they need to operate at in college?

And sure enough, if you pull up the science practices and skills for AP the word “create” is literally all over the place. The top of the pyramid.

From here we took a look at a recent exam question. First I asked them a simple question:

Which of the following is true about work?

  1. Work is effort
  2. Work is a change in energy
  3. Work is a force

They all know the answer. And this is a recall answer.

Then I showed them the exam question (they did really poorly on). While the question fundamentally was about the fact that work is a change in energy, what they were asked to do was apply the concept of taking an integral to calculate work and then create a graphical representation.

From here we discussed the differences between studying and learning and posed the question, “which would you work harder for? To study to get an A on a test, or prepare to teach the material to the class?”

The latter half of the workshop is about sharing strategies for doing homework, reading the text, and using practice exams. (You can find all of these in Dr. McGuire’s work and resources!)

I summarized some of these along with my personal favorites into the following list:

  • When you get home from school, write down everything you can remember from class that day, then compare with your class notes to identify/fill the gaps
  • Did you solve some problems? Grab a clean sheet of paper and solve the problem again. Compare to the example and make notes regarding your forgetting/gaps
  • Create a concept map to tie together big ideas and conceptual details
  • Make “teacher notes” as if you were preparing to teach the material
  • Aim for 100% mastery when you sit to study, not 85-90

As we wrapped up, the most important part of this workshop was asking students to make a commitment to do something different in the next 24 hours. I had students submit these along with some additional reflections. There were two that stood out to me today. One student reflected, “The reason this class is so challenging for me is because I haven’t had a class besides maybe Calc that required me to be at that creating level.”

A second student made an observation that knocked me over in joy:

“Physics is more than just who is smarter and has the ability to think at a higher level.”

And with that, I’m signing off. I’m going to attach my version of the slides, but everything is very much thanks to the work of Aaron Titus and Saundra McGuire.

Activities · In My Class Today

Waves Intro Activity with Virtual Ripple Tank

When I was in college my E&M professor introduced me to the falstad apps. It was literally this guy who created a bunch of different JAVA sims. E&M is notoriously challenging due to needing to think and reason in three-dimensional space, so we were encouraged to use the apps to help us visualize static fields.

When I started teaching I decided to poke around and see what else Falstad had created. One of his simulations I use year over year is his ripple tank. It’s incredibly powerful and way less cumbersome than setting up the actual water tables (which was just unfeasible being the only physics teacher with 3 preps)

I just finished my intro activity today so I figured I might as well share. You can find the simulations here.

When the app opens it’s pretty simple. A “faucet” wave like the one in the Phet sim is present. You can see the sliders to adjust for damping and frequency. You can move the source where ever you like and can even toggle into 3D view

What’s pretty awesome is the list of “examples” you can select from the drop down menu.

Single slit, double slit, two-sources, refraction, total internal reflection and a whole slew of topics. You also have complete freedom to add to the simulation using the “add” menu bar at the top.

For my students, we start our waves unit in the following way.

First, we watch the slo mo guys film this ginormous 90 foot wave... with ducks…. which is awesome.

There’s a lot of really great phenomena here. From constructive interference, to refraction and lenses (pay attention to the grid image in the column) to the idea that waves transport energy, not matter.

Next, students head to the sim. I provide them directions on this document and the record their observations on this one.

This activity typically takes a class period and a half. For my advanced students they can usually finish in a class period or I can assign the rest for homework.

When students return the following day, I put this graphic organizer up and prompt them to write their own definition of the behavior based on their observations and a diagram to go with it

During the unit I come back to this app quite often.

We discuss how the design of an auditorium is based on nodal lines

I can drag the single source around to demonstrate doppler effect and sonic booms

If there’s a phenomena I want students to be able to observe, pause and manipulate… there’s usually a way to do it.

Activities

Written Companions for Physics Classroom Practice

The Physics Classroom holds a place near and dear to my heart.

For years I thought it was my special secret. Long, long ago the url was something like physicsclassroom.glenbrook225.k12.il.us because it was a site hosted on my High School’s sever. The main author was Tom Henderson, one of the best educators at GBS. Tom taught the most advanced freshman in chem-phys, as well as the conceptual physics course. He had a great handle on meeting kids where they were at and explaining physics in a way that made sense as a student.

It wasn’t until much later I realzied that physics classroom was a well known resource for physics teachers across the nation.

As a student, something I realized was that what I found fun, challenging and helpful to my learning in physics was often a barrier and frustration to my classmates. Getting an “O Drats” without a way or opportunity to reflect or see where an error was made became maddening and frustrating. At the same time the essence of drilling a tiny skill is so valuable for long term learning.

I steered clear of most online homeworks for a long, long time (webassign also traumatized me). I knew that too often the real work that needed to happen to actually learn was skipped by most students in search of elusive green checks. By the time you got the checks, you had no memory of what actually worked.

Over the last few years I’ve started developing handouts to go along with some of the physics classroom activity sets. I only have a few, but enough that I feel like they are worth sharing publicly at this point. The goal is to get students thinking, writing and documenting as they work through the physics classrom activities. It also provides me with documentation. I will admit, another motivation for this was the fact that I did not have a paid subscription to task tracker. Now that I do, I’m developing more of these and will continue to share and post them here as I develop them.

What I’ve found is that more students are able to move through more problems with more success and confidence. Definitely a win! They hate me for slowing them down with the paper documentation, but I see it as a win.

Without further ado, here is the list:

Kinematics

Match That Graph Interactive

In the paper document (preview below) I ask students to first describe the motion in words. This way, when they watch the little car drive across the screen and make the dot diagram, they know what they are looking for

Kinematics Calculator Pad Sets

In the paper document, students are prompted to make their picture, their chart of variables and solve the problem by selecting an equation then substituting values as needed. This is a second version (sample below) that is specific to set 12, and provides more room for student work.

Momentum

Concept Checker: Case Studies Impulse and Force

The first few pages of this document are notes in which we construct the momentum bar charts for different situations and identify what is the same and different. Then students go to the concept checker and I ask them to create the bar charts and document the similarities/differences prior to making their selections. A preview is below and here is the handout

Work and Energy

This document can be used for the calcpad sets. I ask students to draw a picture, construct a bar chart, and solve the problem starting with conservation of energy. Preview below

Waves

Open Tube Concept Builder (can be used for closed tubes as well)

Document here, preview below

Activities · Teaching Methods

AP Free-Response Practice, Skills and Metacognition

It’s been two weeks since I got back from the AAPT Winter meeting inVegas and I’ve barely had time to sit and reflect. I’ve made some big changes this school year. Exactly one year ago I interviewed for the AP Physics position in a new district. It was one of the more challenging decisions I’ve needed to make in my career, and the first time I was walking into an interview fully confident of who I am as an educator, what I want in my future and in complete control. (When I took my position at Auburn I was confident, but hadn’t yet taught an AP course). With a new position comes new challenges and adjustments, but a new position paired with experience and confidence also brings the opporuntity to recognize challenge for what it is: an opportunity to search for innovative solutions. That’s one of the best parts of teaching; getting challenged in ways that require creativity.

With challenge comes a heavy mental load and so when the deadline came around for the AAPT abstracts I quickly threw together an abstract related to holding students accountable when we do work a la Building Thinking Classrooms (Accountability on Ungraded Homework) but had only shared here on the blog. A part of me felt pretty lame as this particular idea didn’t feel as exciting as I thought it should be for presentation, but I’ve learned that we are typically our own worst critics, and it’s always valuable to go ahead and present anyway. (Here are the presentation slides)

As it turned out, my session was loaded with three other awesome talks that all complemented one another really, really well. Aaron Titus talked about his “how to test better” workshop which is secretly a “How to Learn” workshop. Another faculty member talked about standards based grading at his college and Kathy Willard at Case Western talked about some metacognitive work she’s engaging students with. This session, tied with the AP sessions that took a deep dive into the science practices got me thinking about how to put all of this together to support my students.

The result? An FRQ reflection form.

Part of this spawned from the fact that we had -30 windchills last Friday and a remote learning day. With remote learning obtaining student feedback is more critical than ever for me, but I realized this would be a good strategy to maintain for all FRQ practice.

The Process

  1. Students complete an FRQ alone under timed conditions
  2. Students flip their work upside down and move to vertical whiteboards. They are permitted the next 15 minutes to discuss the problem and they can whiteboard their work/discussion as they go. This is a riff on friends-no-pens due to the complexity of the problem.
  3. As students wrap their discussion, I ask them to consider how the points are distributed.
  4. Students return to their original work and have 10 minutes to revise/add to their work. The way my room is set up students CANNOT see the work on the whiteboards
  5. Students self-score the FRQ. I ask them to give themselves a first pass and second pass score.
  6. Students complete the reflection

The reflection is a google form. The nice thing about this is that in addition to collecting this data easily, I can link multiple forms to the same spreadsheet to track changes over time.

The Google Form Reflection

This first part is asking students to think metacognitively in a few ways. First, I want them to see the gap between their individual and group-think. In a highly collaborative classroom, sometimes students think they have a better handle on the material than they actually do. The first pass at the FRQ gives them a chance to see what they are capable of alone. The second pass allows them to see that they can and do understand more physics than they might give themselves credit for, but it’s not currently encoded in their long term memory. This gives students a place to identify as a study need.

Next, I use the standards information available in AP classroom to provide students a check-list of the skills that were assessed. I ask them to identify both what they did well on and what they did not do well on.

To wrap it all up I ask a final question to get a guage on what my students believe they need more of.

Looking At Results

Below is a snapshot of some of my student results and reflections. I sorted the original scores from lowest to higest so you can see the improvements. This was a Translation Between Representations question which is worth a total of 8 points.

First, observe how much scores increased from original to group think! But what I think is particularly important is that this work happened without access to notes of any kind before and after conversation. When students return to their papers they no longer had access to the whiteboard work.

Next, I think some of the “aha” moments are particularly important and poingnent. I especially love the first one that is more about testing strategy. (This particular student is a rockstar, but the physics assessments have been rough for them).

I thought this data was particularly interesting:

I think anyone who teaches AP knows kids dread the word “derive” like we’re asking them to be Einstein Geniuses (more on that in another reflection another day). Interestingly, my students reported that they all need help on derive, but actually my data from AP classroom and testing informs me that functional dependence is actually one of their weak spots. And yet, students aren’t overwhelmingly identifying it as one. I’ve determined that this particular blind spot is going to be an area of focus these last few months as we enter the final lap.

Asking students where they struggle is always telling regarding their thought processes. Currently many of my students are still stuck in a very algorithmic way of thinking/approaching physics rather than working big picture down and it remains telling in their responses. This is still really valuable information because in order to get students where I need them to be I need to meet them were they are at first.

Activities · Teaching Methods

I revised the cannon launch!

In my last post I talked about how I finally reenvisioned collisions and explosion problem solving for my on-track physics. It went so well I’m definitely going to integrate more of it into AP.

The goal of the reenvisioning was to set students up for a meaningful tennis ball cannon launch lab at the end of the lesson sequence.

If you’re unfamiliar, you create a tennis ball cannon, launch it, and have students calculate some quantity based on momentum conservation. To be honest, I haven’t run this lab since my first few years teaching for a few reasons. One was that my cannon got stolen at my first job. Then I decided that whole class labs are less effective than small group work and I hate when it looks like everyone is copying answers. The activity just wasn’t meaningful enough.

But after talking to several friends, everyone was excited about the idea of a cannon launch, so I spent my weekend rebuilding a cannon.

To open the lesson I set up and demonstrated an “explosion” with our car-track system. I ensured that one car had more mass than the other and we had some conversations about what to expect. We also talked about what the equation would look like based on our previous experiences with elastic and inelastic collisions. Students were able to correctly determine that it’s basically the opposite of an inelastic collision.

Next, I gave them the scenario where the cannon had a mass of 4.0 kg, the ball had a mass of 1.0 kg and the cannon’s launch velocity was 5 m/s. These numbers were strategically chosen. I wanted to keep whole numbers and also have a cannon-ball ratio that was similar to the actual cannon-tennis ball.

Students then completed the four representations as we’d previously done earlier in the week. Below is a student work sample.

The great thing about this was that students were able to accurately represent and predict the outcomes of the cannon-ball system before we got into the muck. This got students thinking individually and talking in small groups. We also discussed why the results made sense.

To launch the cannon I let it go through a photogate to snag the post explosion velocity and then students completed the calculations.

For the post-lab analysis I threw in a few thinkers. They included:

  • Find the average force on the ball
  • How would a longer cannon change the ball’s launch speed? Explain in terms of impulse-momentum
  • If we used the same cannon but filled the tennis ball with rice, what would happen to the speeds of the ball and cannon post explosion?

You can see a sample student response below:

These questions led to some really great conversations that brought us back to equal forces, equal momentum changes and where time falls into the mix.

Activities · Teaching Methods

How I Teach… Forces (Intro, the Observational Experiments)

The first set of posts I wrote for this series was about momentum because I made such a large shift from how I used to teach to how I currently teach.

In the same vein my teaching of forces has also changed.

In the past my force unit looked like this:

  1. Inertia Day! Lots of Demos, initiation into the inertia club with club cards (you hold the card on your index finger with a penny on top and figure out how to flick the card out from the penny)
  2. F=ma. Define it, notes, define force diagrams, practice force diagrams. Practice F=ma problems.
  3. One day on action-reaction. Gloss over it; “it’s easy”

I cringe writing this out now. It was so boring! Inertia and action-reaction felt like fluff. We don’t need fluff!

Currently, my unit structure is designed with the big ideas in mind. (Because, tenet 3: Order Matters, Language Matters) I was excited to see that the idea that teaching in a structure that models the thinking we are targetting to improve outcomes is actually supported by research, so my model draws on Lei Bao’s frameworks for force:

One of my biggest frustrations was students putting random “F(applied)” on force diagrams. It irked me to no end!

So starting with the framework for Newton’s Third Law, I turned my force unit on its head. The fundamental piece we begin with is:

A force is an interaction between objects

Observational Experiments

We start with the activity from Pivot Interactives where two cars collide.

Students are asked to separately write what they observe about the car motion and also what they observe about the force acting on each car.

After making the observations we discuss.

The primary aspect students recognize is that heavier/faster cars result in bigger forces. That’s all well annd good, but what about the force that each car experiences. Even though they’ve literally just witnessed and recorded it, they still want the heavier one to hit harder than the light one within the same collision! We closely observe this together and see that, indeed, the forces are always the same.

This is what allows us to define a force as an interaction between objects. Without a second object pushing on the ring, the ring won’t squish. Since the force is something that happens between, it must be equal and opposite.

This very small shift has been a game-changer. It is very rare for me to have students putting totally random forces on objects because “it should have one”.

From here we dive into Eugina Etkina’s ISLE cycle.

Students are asked to hold a heavy and a light object in each hand, palms up and then represent those objects with arrows on a diagram. Students are asked to label each arrow with the object interaction. This is a fun one because a lot of kids are quick to label “gravity” but when I inform them that gravity, is not in fact, an object, they have a moment of pause. Eventually all students arrive at the correct diagrams: equal sized forces on each object, bigger forces on the heavier object.

From here I diverge between AP and regular physics. In regular physics we will go directly to the mass vs weight lab where students will ultimately derive the expression F(earth) = mg. With AP we continue to follow a modeling cycle with experiments with a bowling ball down the hallway: rolling, constant force forward, constant force backward. Then I ask how we could have constant velocity AND constant force. Students are quick to say “push down” (and we are fresh off of projectiles where x and y are independent!). Then realize if we alternate “taps” that will do it (balanced forces). Students are asked to represent and reason by drawing a complete motion map, an accompanying force diagram and then look for patterns. In this way students then recognize that balanced forces will result in constant motion (including v=0) and unbalanced forces result in accelerations. For homework students will complete two exercises from the Active Learning Guide from Etkina’s book where they will continue to practice drawing motion maps and force diagrams together in order to find relevant patterns. From here we get ready for labs!

Up next… labs labs and more labs!
Quantitative Experiments with Forces

Activities · In My Class Today

SciComm Unit Results

A few weeks ago I posted the article We Did Improv in Physics which outlined my four-day mini-unit emphasizing communication and presentation skills. Students did this in a number of ways including deconstructing TED talks, writing a blog post about their research, and giving a two minute impromptu version of their talk, in addition to the improv workshop. While the energy and the feelings in the room were fantastic, I also collected survey data from students that I’m going to share here.

Overall Results

Before we started the unit I asked students a number of questions around presentations. One of the prompts ask students to rate their confidence when presenting in front of peers from “Very Anxious” to “Very confident”. When the unit ended I asked them how they were feeling about presenting their physics projects. The results were astounding.

While the four day experience wasn’t quite enough to build substansial confidence (increase from 39 to 52%) the amount of anxiety significantly decreased from 42% of students reporting some level of anxiety to only 14%. About half of these students moved from anxious to neutral and the other half moved from anxious to confident.

Students were also asked to rate the statement “Being able to give presentations is an important skill for me to acquire” the number of students who marked “very important” doubled from pre to post assessment.

Students were also asked what the single, most important aspect of an excellent presentation was. While many of them stated “audience” there were also a great deal of other responses such as confidence but also things like structure, organization, and knowing your own material well

After the mini unit these responses were reduced to those that were emphasize from the lesson. An increase in the response “audience” was noted as well as an increase in mentions around the visuals. Noticeably less was “confidence”

Student Feedback On Activities

Students were prompted “Considering your final presentation, how valuable were the activities around dissecting the various talks?” Student rated on a 5 point scale from “not valuable at all” to “very valuable”. A summary of student responses for each of the three activities is below.

Turn Your Paper into a Blog Post

56% of students found the blogging activity to be useful, with only 8.7% of students reporting it was not. Some of the comments are below with scores in parenthesis:

  • It helped to see how there was a different type of communication between presentations and the lab report itself. (4)
  • It helped show us how to communicate our project in an understandable, engaging, and quick way. It used common language like our presentation will. (4)
  • I felt like the activity where you turned the report into the blog was helpful because it showed how you would convey your report to an audience rather than someone reading it just for information. (5)
  • By doing the blog post and using informal words I realized that this physics presentation was more like a conversation between our peers. We were just sharing our finding with one another and the blog post helped organize all this information. (4)

Interestingly, the students who rated the activity low still reported the value in the activity’s intention, demonstrating that the low score had more to do with their perceived needs than the intented learning.

It was somewhat helpful for making the presentation interesting and easy to understand. However, I didn’t find it helpful for actual content which I’m more concerned with. (2)

Data Viz Presentation & Evaluation

87% of students found the Data Viz presentation helpful. I think this is interesting because this was the one “lecture” that was provided and I know my students tend to prefer lectures. Still, there were some great reflections from students:

  • I did not realize how much detail is given into making slideshows. For example, I would have never thought about making slides colorblind proof. (4)
  • I especially liked this activity because it enabled us to visualize what we could change in our presentations through using new strategies. I especially found important how we learned to use less words and things on each slide, making them simpler. Also, the rule of thirds was a good guideline for how we laid out our slides. (5)
  • It helped to see the ways the data can be shown to not over power the audience with so much information at once. (5)
Improv Workshop

48% of students found the improv workshop to be helpful with only 8.7% reporting it was not helpful. There are a couple of pieces of evidence from the commentary that support these low numbers, even though there were drastic results observed in the pre- and post- presentations. Firstly, the intention of the activities was not clear to students until we debriefed. We did improv on a Friday and debriefed on Monday. Secondly, the workshop put students very far outside of their comfort zone.

Overall Impact

Overall students were very positive towards the mini unit. A few comments of note:

  • I think it was really valuable to have this unit because none of our other teachers really sit and go through what a generally good/well-rounded presentation should look like, they only focus on content/course specific presentations
  • It felt like a breath of fresh air, and made me realize that communication is a huge skill in in physics apart from problem-solving obviously.
  • I think that unit is helpful when it comes to sharing your findings with other people in an effective manner. I learned quite a bit about how to construct my slides to show only the important information. This unit is also helpful in feeling more comfortable presenting in front of your peers.

Students were also asked if I should run this lesson again. Every student except two said “yes”. The two exceptions marked “maybe”. Of note is that the two “maybes” expressed discomfort with the improv workshop, but had generally favorable commentary regarding the other activities.

Honestly, the results are beyond what I was hoping for. This is something I will absolutely continue.

Activities · Teaching Methods

How I Teach… Energy Part 4 – Energy Activities!

This is part of a series!
Part 1 (Work) Part 2 (energy bar charts) Part 3 (problem solving)


I have this lab I received from a colleague, it’s an iteration of a lab I’ve seen in other places. Basically an object goes down a ramp, gets caught by a paper catch/index card etc and students are looking for some iteration of work and energy.

In the version I have students are asked to find a relationship between height and distance. The cool thing about this is it ends up that height is directly proportional to distance and related by the coefficient of kinetic friction alone.

Student’s work looks like this:

Students are asked to complete the lab with a hot wheel car and then again with a small mass attached to the car. To students’ surprise the lines are not identical. This really bothers students until we discuss what we were actually looking for. See, the lines are still parallel, but the car with more mass is going to have a greater momentum at the bottom and will require a greater impulse to stop. It’s a fantastic conversation piece.

Student generated graph from lab

I really enjoy this lab because it requires students to consider a new problem and then apply that knowledge to a lab setting. Research has shown that students don’t really learn content in the lab, they learn lab skills. I was always a little frustrated with the disconnect between all of the work students put into the theory and then the lab results themselves. So this time I changed things up.

Instead of giving students the lab hand out and letting them work in groups, when students walked into the room they were put into visibly random groups. Visibly random grouping just means you create the random groups in front of students so they see it was truly random. I’ve been immersed in the book Building Thinking Classrooms and the research on this is really cool.

Once students are in their groups and at a white board that is vertically mounted, I’m in the middle of the room at a lab table with the lab set-up. I verbally explain the set up and that I want them to derive a mathematical model for the relationship between height and distance.

Vertical whiteboarding is really cool and has several advantages. First, students are standing which puts them into a more active position, this gets more of them working. Second, it’s really easy to just look around and snag ideas from other classmates. Third, since they’re already standing it’s really easy to move around the room and discuss with other groups. The first time I did this what astounded me was the sheer number of students talking. Instead of it being maybe 4 or 5 leaders it was nearly everyone in the room! There was so much collaboration and ownership of learning it was magical.

Taking a peek to get ideas is easy!

So I did this with the first part of the lab. Next, I asked them to sketch what the graph will look like with the two lines. Almost all of the students sketched the two lines on top of each other. I want them to have the experience of their data not aligning with their previous ideas and having to reconsider, so we left it at that. Then students were off.

I’m going to finish this lab this week, so I’ll have to come back to update this post, but I love this activity and vertical whiteboarding gets a 10/10 every time.

Activities · In My Class Today · New Teacher

3 Ideas for a Strong Start

It is the end of July, the back to school sales have been running for a month, the #clearthelist movement is in full force. While I keep telling myself I have ALL of August left (that’s actually a lie, I have institute the 30th/31st) many of us are starting in just a few weeks. Here are three ideas to start physics strong. These ideas are grounded in my values and beliefs around teaching physics. You can read about those here

Physics is about EXPERIMENTS

I want students to know science is investigative and that anyone can do it. Many teachers will do a team-building activity on the first day, but I prefer to let students play. This gives me a chance to observe the dynamics of each class before I begin to influence the room and it also takes any pressure off of students to perform for one another or myself. I try to set up a demonstration or lab from each of the units for the entire year. Directions for observations are left on a notecard in front of the set up. Students are asked to write down detailed observations about each demonstration. Over the weekend I ask students to find the demonstration online and learn about how it works. Students are then asked to write a claim, evidence reasoning statement about a single demonstration. Here is my handout and some of the demos I set up

Getting to Know You

When we begin class I ask students to introduce themselves, rather than butchering their names on the roster. I take notes for myself. I ask students to share their name, and how they are feeling. I will also ask them to create a flipgrid introduction with a little more info. This allows me to have their pronunciation recorded so I can review it repeatedly. Here are the prompts:

1) State your first and last name
2) What is something you’re really into, or “your thing?” This could be an interest, hobby, job, talent, etc… anything!
3) Post a picture in your video of you doing your thing or a product from your thing
4) What is one thing you wonder about one (or more) of the demos from the first day? (I wonder why….)
5) Respond to at least TWO classmates!

Physics is for Everyone!

I am a STEP-UP advocate and one of the lesson plans in the program is the Careers in Physics. In the lesson students learn about the vast scope of employment opportunities with a physics degree and then are asked to create a career profile. Students do this by taking a super short survey where they check off their interests and values and then they are matched with a professional who shares their interests. You can access the lesson plan and resources here.

I hope you find these ideas useful! What else have you done to set the tone for the year? Drop it in the comments!

By the way, I LOVE writing about how to teach physics WELL! Check out my “How I teach” series as well as “The Science of Learning Physics